It’s that time of year, everyone is dressing their homes ready for Halloween and then Christmas!
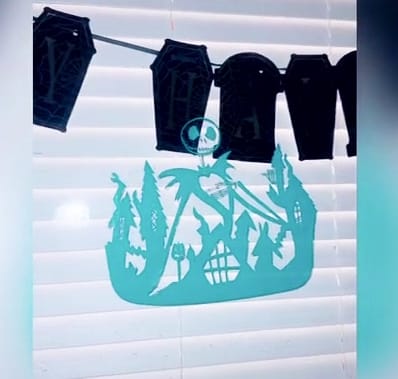
The boys have recently discovered “The nightmare before Christmas” so I created a cute window display ready for Halloween.
This was so easy to do, took me around 20 mins in total and the boys along with passes by love it! We have had lots of smiles and children pointing. I’m already planning our Christmas display which will be bigger and better!
Using my Cricut Maker 3 and Cricut Smart Removable Vinyl gifted to me from “Crafting outlet” shop products here.
If you don’t have smart vinyl this will also work with normal vinyl on a matt, bigger the mat the bigger the design can be but you could also do it in stages!
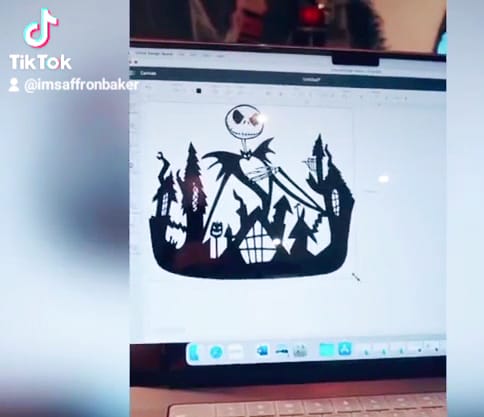
Step 1 – Choose your design, we opted for the cute Jack Skellington scene
Step 2 – Scale up the design to the measurements you want, in hindsight I would of gone bigger but it worked great with a banner in the window.
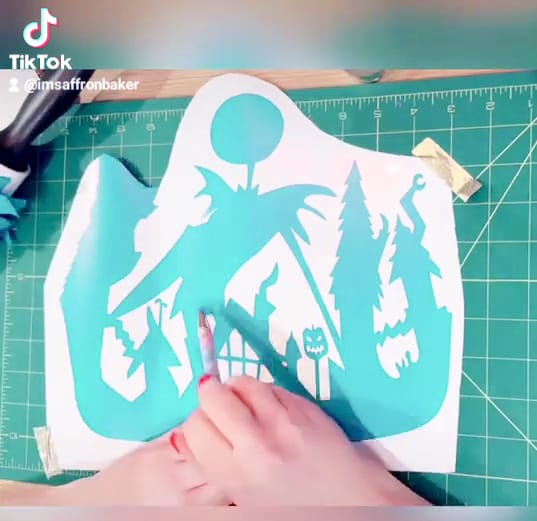
Step 3 – Choose your materials and load the mat, I went for Cricut’s Smart Removable Vinyl in the shade Aqua. Its durable but removes easily without leaving a sticky residue perfect for walls and windows.
Step 4 – Set your image to “Mirror” especially if it has words in it as you want it to be the right way when looking from outside. Set your cutting settings to meet your materials and press go!
Anyone else just love watching the Cricut Maker 3 cut? It blows my mind especially when using smart vinyl, the speed is crazy!
Step 5 – Unload the machine and start to weed, this is my absolute favourite part I find it so satisfying to do. Being able to slowly see the image come to life.
Step 6 – Apply your transfer tape over the image and smooth out making sure there’s no bubbles.
Step 7 – Clean your window to make sure it’s free of dust and dirt, rubbing alcohol is great to use for this.
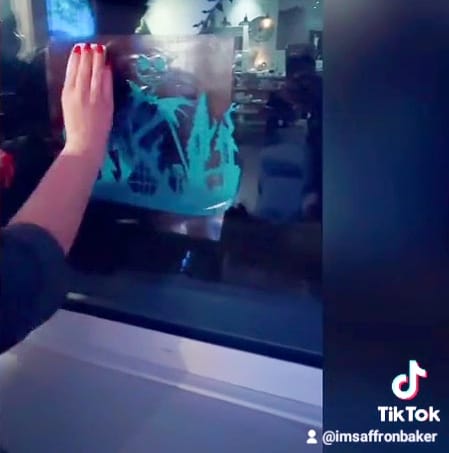
Step 8 – Apply vinyl to the window and using your scraper tool gently rub over the design to make sure there are no air bubbles and the vinyl has stuck down all over.
Step 9 – Remove the transfer tape slowly and carefully using your scraper to help if you need to.
Step 10 – Go outside to see what it looks like…It will look amazing.
I can feel this being a new obsession for us, you could do displays for all through the year, birthdays etc. I’m excited to try the removable vinyl on the boy’s bedrooms, how cute would Christmas wall art be.
I would love to see what you create tag me in your photos! See the video we created here!
Saff xo
Thank you, Crafting Outlet, for gifting the items used in this make!
